实际进行畸变校正的注意点
复制本地路径 | 在线编辑
有一个项目用到了畸变校正,总结一下注意点
实验图多大于少
项目采图比较麻烦,所以一开始只用了十二张,但效果很不好。建议还是老老实实多采一些图,三十张吧,然后可以从中进行采样以此来比较健壮性。不然只用十几张,风险很大,不好确定是否这十几张就是完美的。
对校正的图进行反求来验证结果
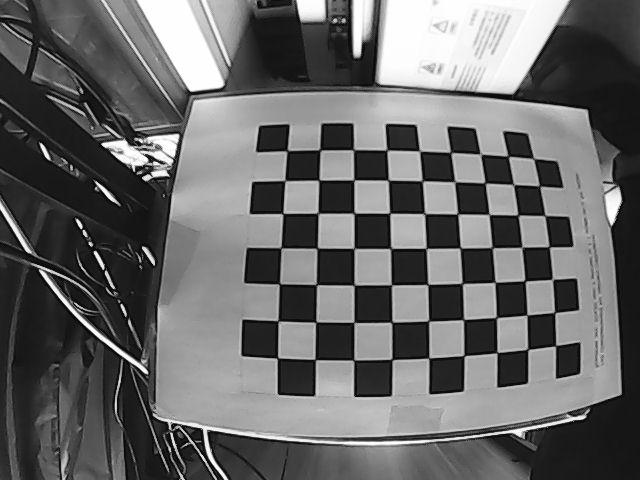
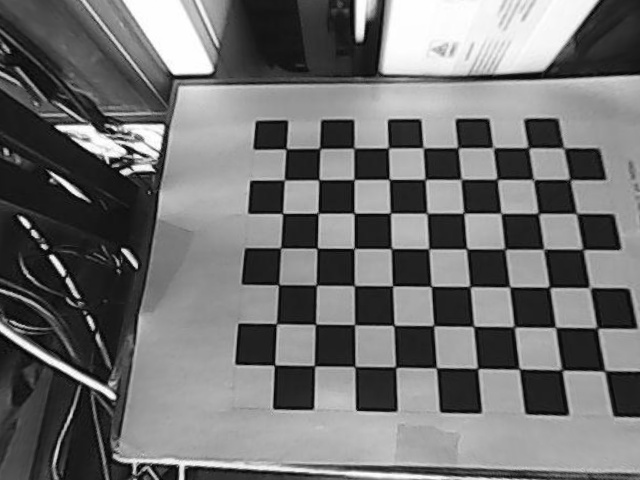
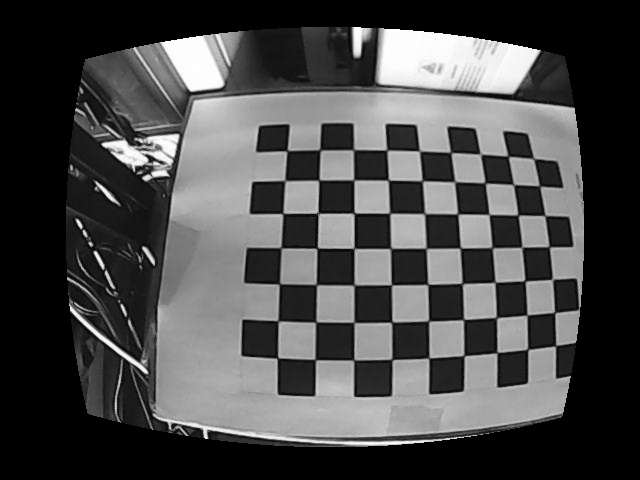
实际使用的过程中,我发现我经常会弄混畸变和反畸变。所以建议两个程序都做,这样不会乱掉,即流程是:采畸变图 → 畸变校正得到一张图 → 对这个图再进行反求回到畸变的图。
进行常规畸变和鱼眼镜头畸变
最好做两种模型的畸变,一个常规的张正友畸变,另一个是鱼眼镜头畸变。具体做法问 AI,用两个才能比较出效果。我一开始就用的正常的畸变校正,看了一下结果以为还可以,但实际过了一段时间才发现原来应该用鱼眼镜头畸变的模型。
简单的代码展示
如下是简单的一个代码展示,具体的做法在同目录的 code 文件夹中。
import cv2
import numpy as np
import math

data = np.load("fisheye_calib_result.npz")
K, D = data["K"], data["D"]
img_size = tuple(data["img_size"])
fx, fy = K[0, 0], K[1, 1]
cx, cy = K[0, 2], K[1, 2]
k1, k2, k3, k4 = D.flatten()

print("#define FISHEYE_FX ", fx)
print("#define FISHEYE_FY ", fy)
print("#define FISHEYE_CX ", cx)
print("#define FISHEYE_CY ", cy)
print("#define FISHEYE_K1 ", k1)
print("#define FISHEYE_K2 ", k2)
print("#define FISHEYE_K3 ", k3)
print("#define FISHEYE_K4 ", k4)

def undistort_point_fisheye(u, v, max_iter=10, tol=1e-9):
    # Step1: normalized distorted coords
    x_p = (u - cx) / fx
    y_p = (v - cy) / fy
    # handle alpha != 0 is omitted for brevity (alpha usually 0)
    theta_d = math.hypot(x_p, y_p) # sqrt(x_p^2 + y_p^2)
    if theta_d < 1e-12:
        return u, v, 0.0, 0.0 # center point

    # Step3: solve for theta (Newton)
    theta = theta_d # init
    for i in range(max_iter):
        th2 = theta*theta
        th4 = th2*th2
        th6 = th4*th2
        th8 = th4*th4
        f = theta*(1 + k1*th2 + k2*th4 + k3*th6 + k4*th8) - theta_d
        df = 1 + 3*k1*th2 + 5*k2*th4 + 7*k3*th6 + 9*k4*th8

        if abs(df) < 1e-12:
            break
        delta = f / df
        theta -= delta
        if abs(delta) < tol:
            break

    # Step4: scale and undistort normalized coords
    s = math.tan(theta) / theta_d
    a = s * x_p
    b = s * y_p

    # Step6: pixel coords after undistortion
    u_und = fx * a + cx
    v_und = fy * b + cy
    return u_und, v_und, a, b

def distort_point_fisheye(x, y):
    """输入去畸变后的归一化坐标 (x, y),返回畸变后的 (x_d, y_d)"""
    r = math.hypot(x, y)
    if r < 1e-12:
        return x, y
    theta = math.atan(r)
    theta2 = theta*theta
    theta4 = theta2*theta2
    theta6 = theta4*theta2
    theta8 = theta4*theta4
    theta_d = theta*(1 + k1*theta2 + k2*theta4 + k3*theta6 + k4*theta8)
    scale = theta_d / r
    return x * scale, y * scale

# === 读取图像 ===
img = cv2.imread("./data_210deg_2/cap_image_3.jpg")
h, w = img.shape[:2]
new_img = np.zeros_like(img)

# 反向映射:目标图像 → 原图像
for v_out in range(h):
    for u_out in range(w):
        # 归一化去畸变坐标
        x = (u_out - cx) / fx
        y = (v_out - cy) / fy

        # 畸变(即映射回原图)
        x_d, y_d = distort_point_fisheye(x, y)

        # 转回像素坐标
        u_src = fx * x_d + cx
        v_src = fy * y_d + cy

        if 0 <= u_src < w - 1 and 0 <= v_src < h - 1:
            # 双线性插值
            ui, vi = int(u_src), int(v_src)
            du, dv = u_src - ui, v_src - vi
            new_img[v_out, u_out] = (
                (1 - du) * (1 - dv) * img[vi, ui] +
                du * (1 - dv) * img[vi, ui + 1] +
                (1 - du) * dv * img[vi + 1, ui] +
                du * dv * img[vi + 1, ui + 1]
            )

cv2.imwrite("undistorted_manual.jpg", new_img)
print("✅ 已生成 undistorted_manual.jpg")

# 反过来再看一下
new_new_img = np.zeros_like(new_img)
for v_out in range(h):
    for u_out in range(w):
        u_und, v_und, a, b = undistort_point_fisheye(u_out, v_out)
        if 0 <= u_und < w - 1 and 0 <= v_und < h - 1:
            ui, vi = int(u_und), int(v_und)
            du, dv = u_und - ui, v_und - vi
            new_new_img[v_out, u_out] = (
                (1 - du) * (1 - dv) * new_img[vi, ui] +
                du * (1 - dv) * new_img[vi, ui + 1] +
                (1 - du) * dv * new_img[vi + 1, ui] +
                du * dv * new_img[vi + 1, ui + 1]
            )

cv2.imwrite("undistorted_manual_again.jpg", new_new_img)
print("✅ 已生成 undistorted_manual_again.jpg")

# 对比显示
cv2.imshow("original", img)
cv2.imshow("manual undistort", new_img)
cv2.waitKey(0)
cv2.destroyAllWindows()
结果如图(原始畸变图→畸变校正图→还原畸变图):